Adding an Intel Wifi card to the Jetson Nano can be a little scary first time through. Fortunately, it’s easy to do! Looky here:
Note: The connectors on the antennas are IPEX MHF4 not U.FL as stated in the video. I hope there isn’t too much confusion.
Background
The NVIDIA Jetson Nano Developer Kit does not include a wifi module. Fortunately there is a connector to easily add one! The connector is M.2 Key E, located underneath the Jetson Nano Module. (Note: The M.2 Key E slot is designed for mostly wireless communications. This connector does not work with NVME SSDs which are Slot M).
WiFi Card
One of the Wifi cards which has been validated against the Jetson Nano is the Intel Dual Band Wireless-Ac 8265 W/Bt (Intel 8265NGW) which supports the now expected 802.11ac Wifi Dual Band delivering up to 867 Mbps with a host of other nice features. Also, Bluetooth 4.2, natch.
Antennas
You will also need antennas for your WiFi radio. If you ever want to turn a radio engineer from meek and mild mannered into a raging homicidal maniac, start up their radio without antennas attached. It’s not good for the radio, and it’s not good for you either!
In previous Jetson kits, RP style antennas provide about 6 dbi of gain. Another popular style of antenna is a film antenna (like those used in laptop computers), which provides about 3.3 dbi of gain. In the video, we chose a film antenna.
In the video we use:
- 2 x 6dBi RP-SMA Dual Band 2.4GHz 5GHz Antennas
- Molex Antenna Wi-Fi 3.3dBi Gain 2483.5MHz/5850MHz Film Antenna (2042811100)
Tools
You will need a couple of screw drivers. One is a Phillips Head #1, the other should be a Phillips Head #2. In the video, we use the trusty iFixit Pro Tech Toolkit.
Installation
First attach the antennas to the WiFi card. In the video, it looks easy. Don’t believe videos. It usually takes a little bit of persuasion to “convince” the two together. The connectors are tiny.

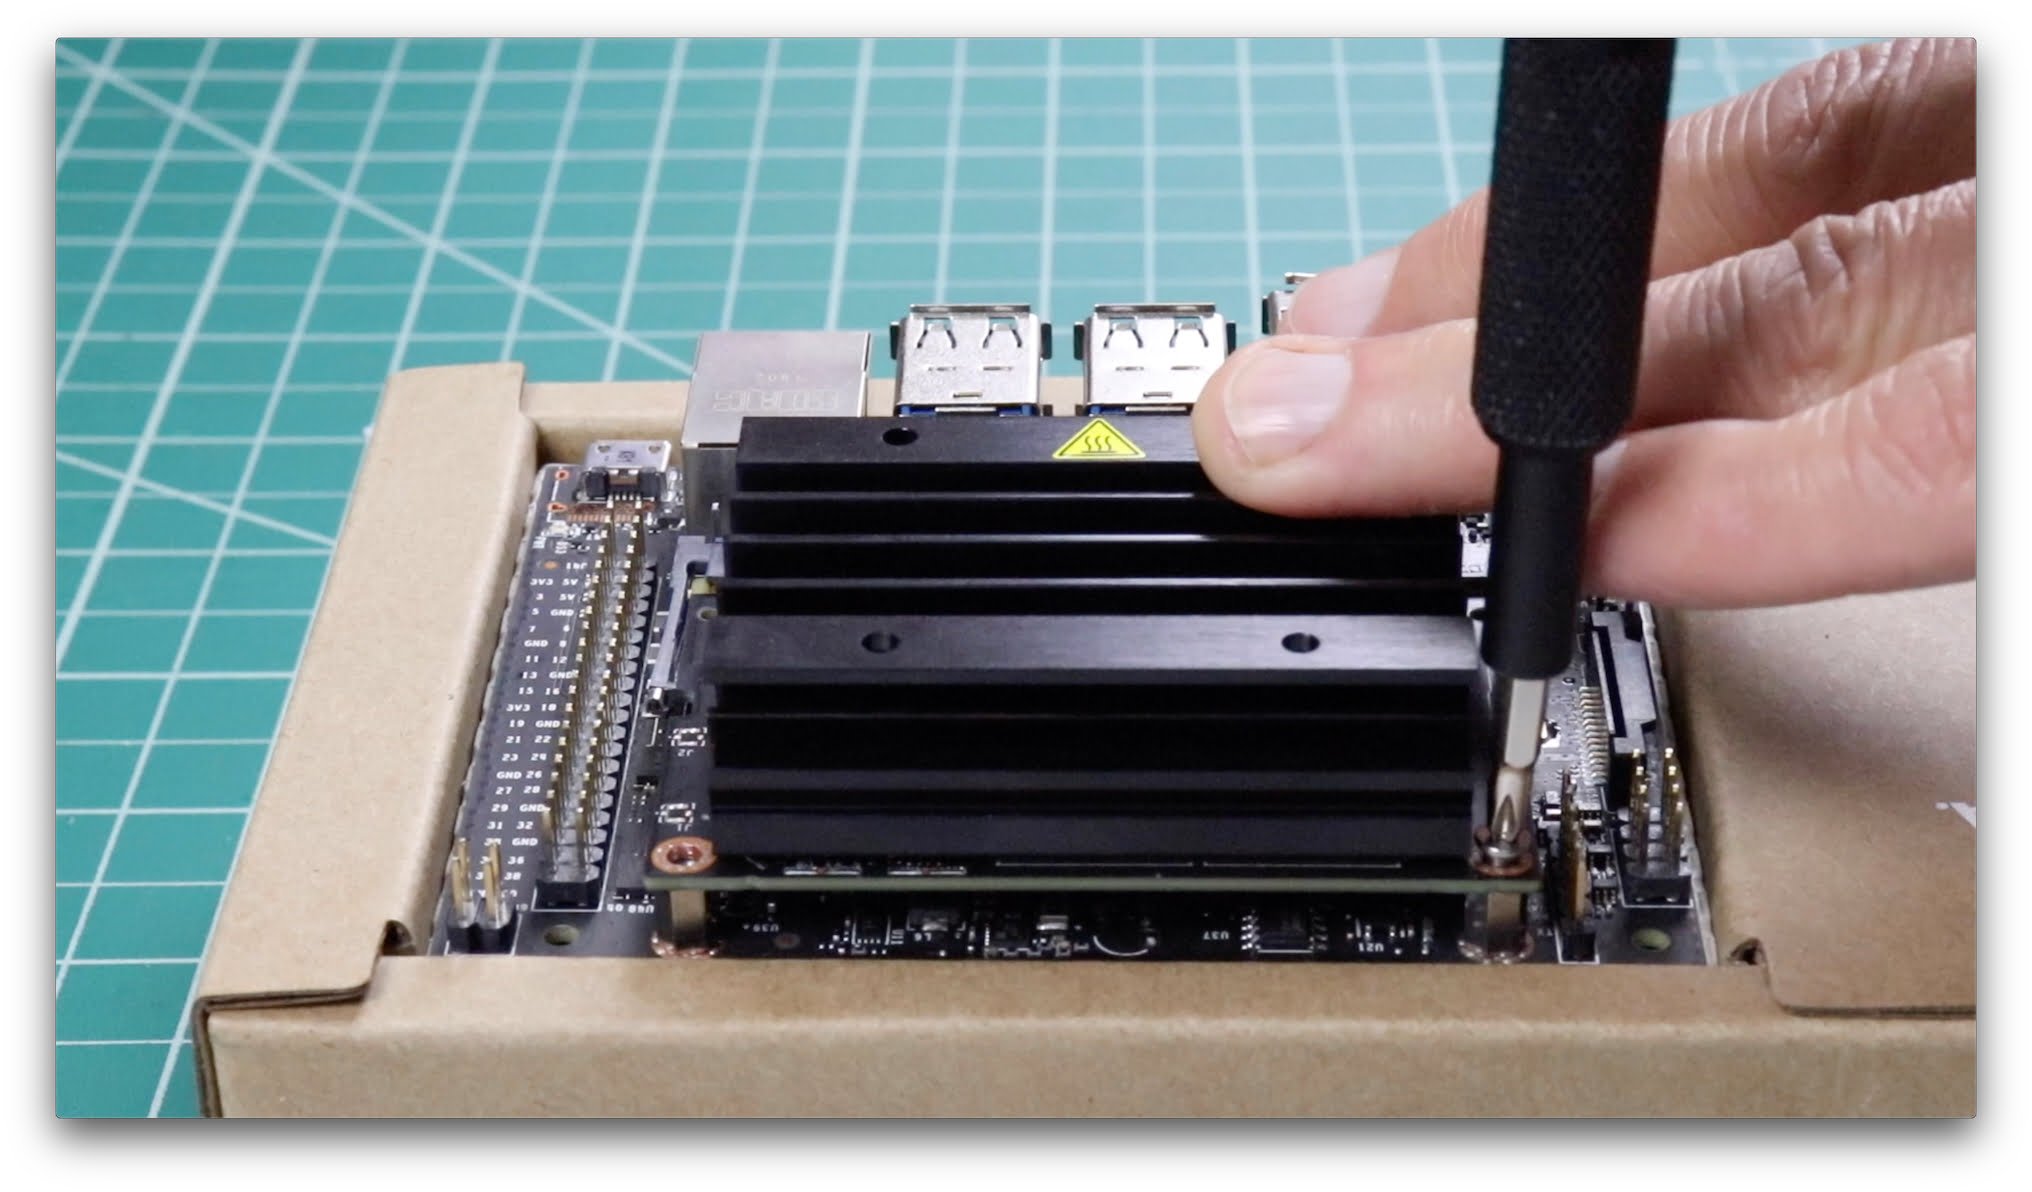
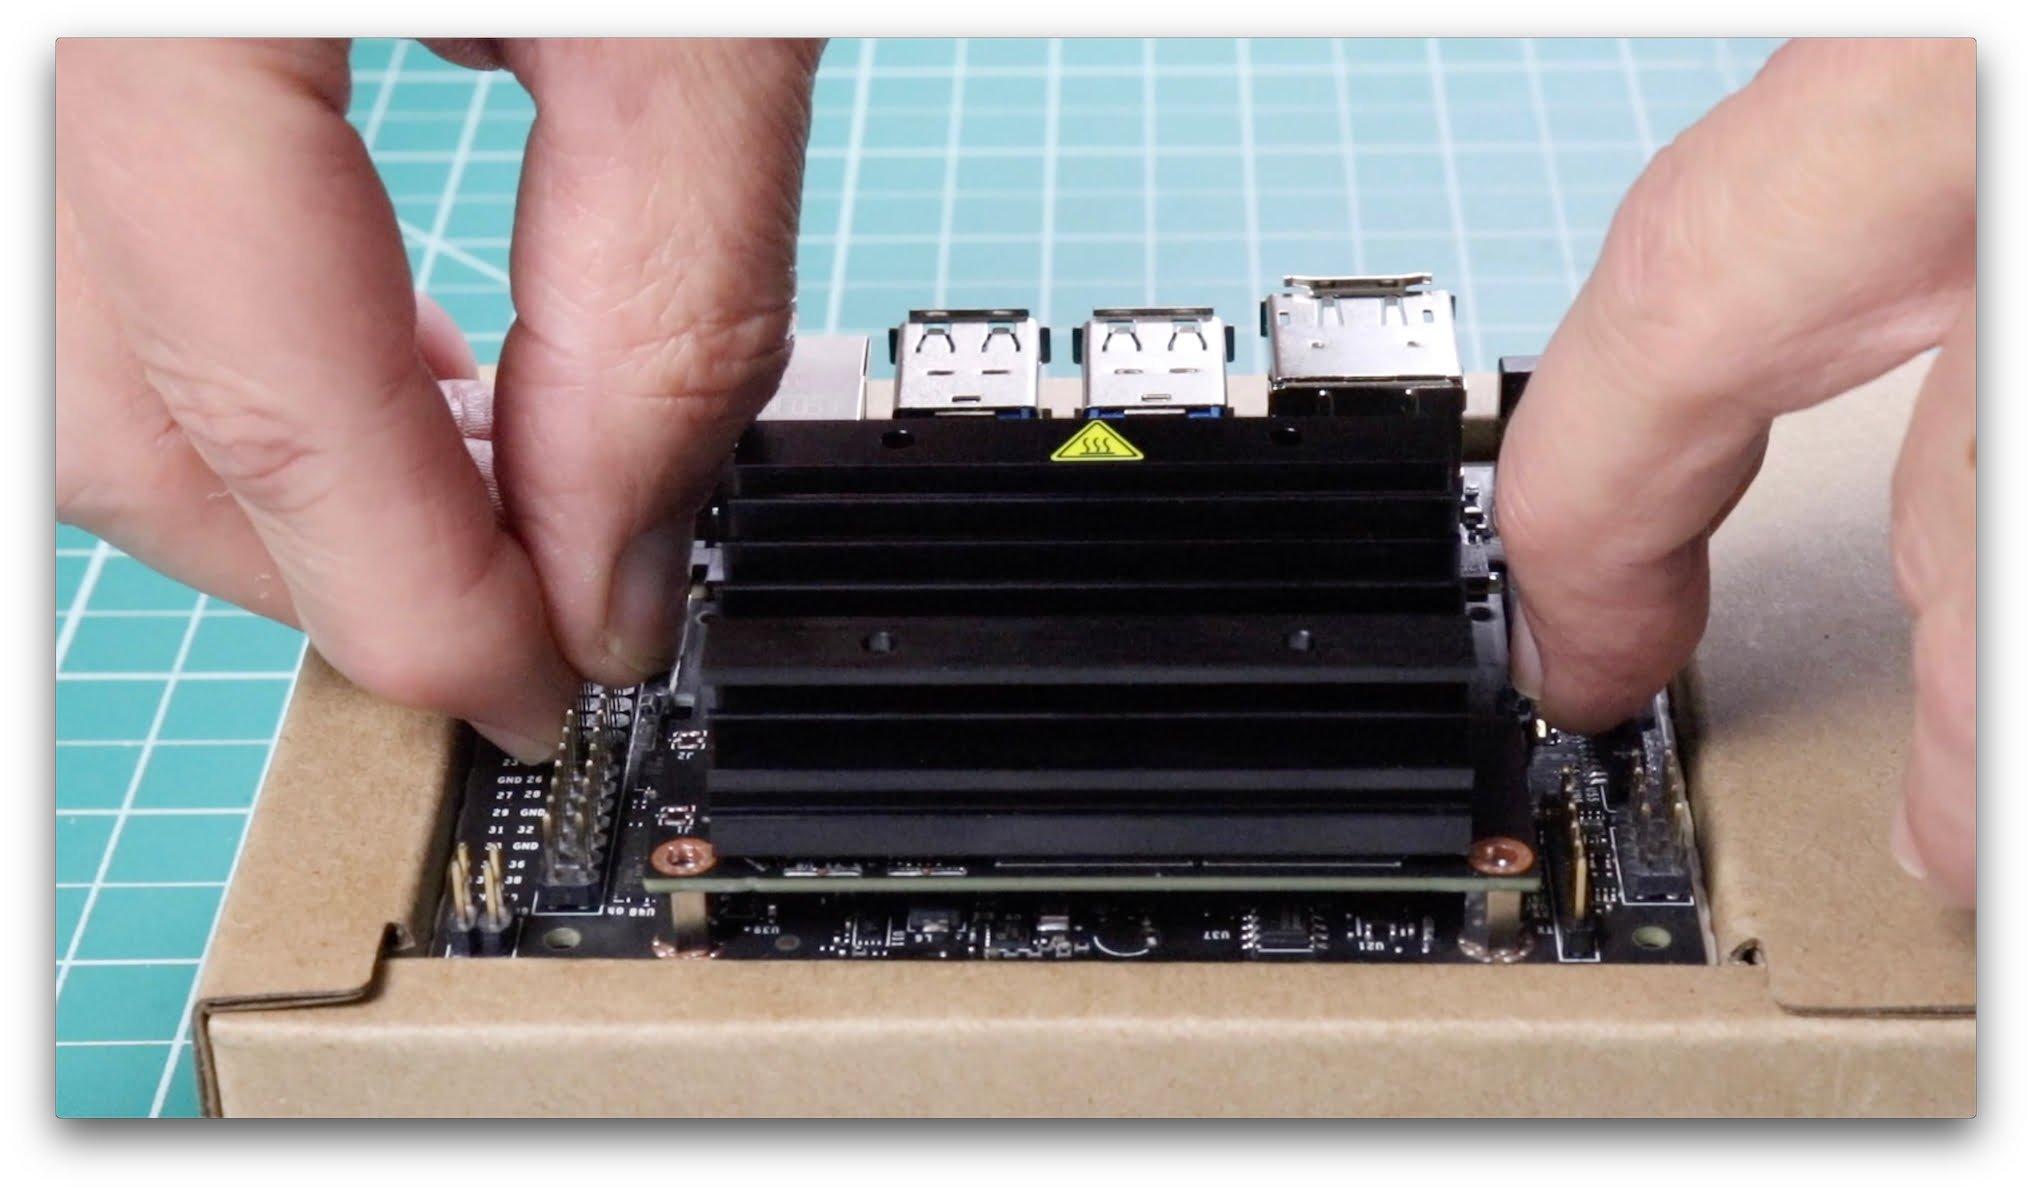
Next remove the Jetson Module from the carrier board by removing the two Phillips #1 screws at the front of the module. Then release the side latches located on either side of the module. These hold the Nano SODIMM module in place. The module will pop-up. Remove the module.
![Remove module screws]()
Remove module screws ![Release latches which hold the module in place.]()
Release latches which hold the module in place.
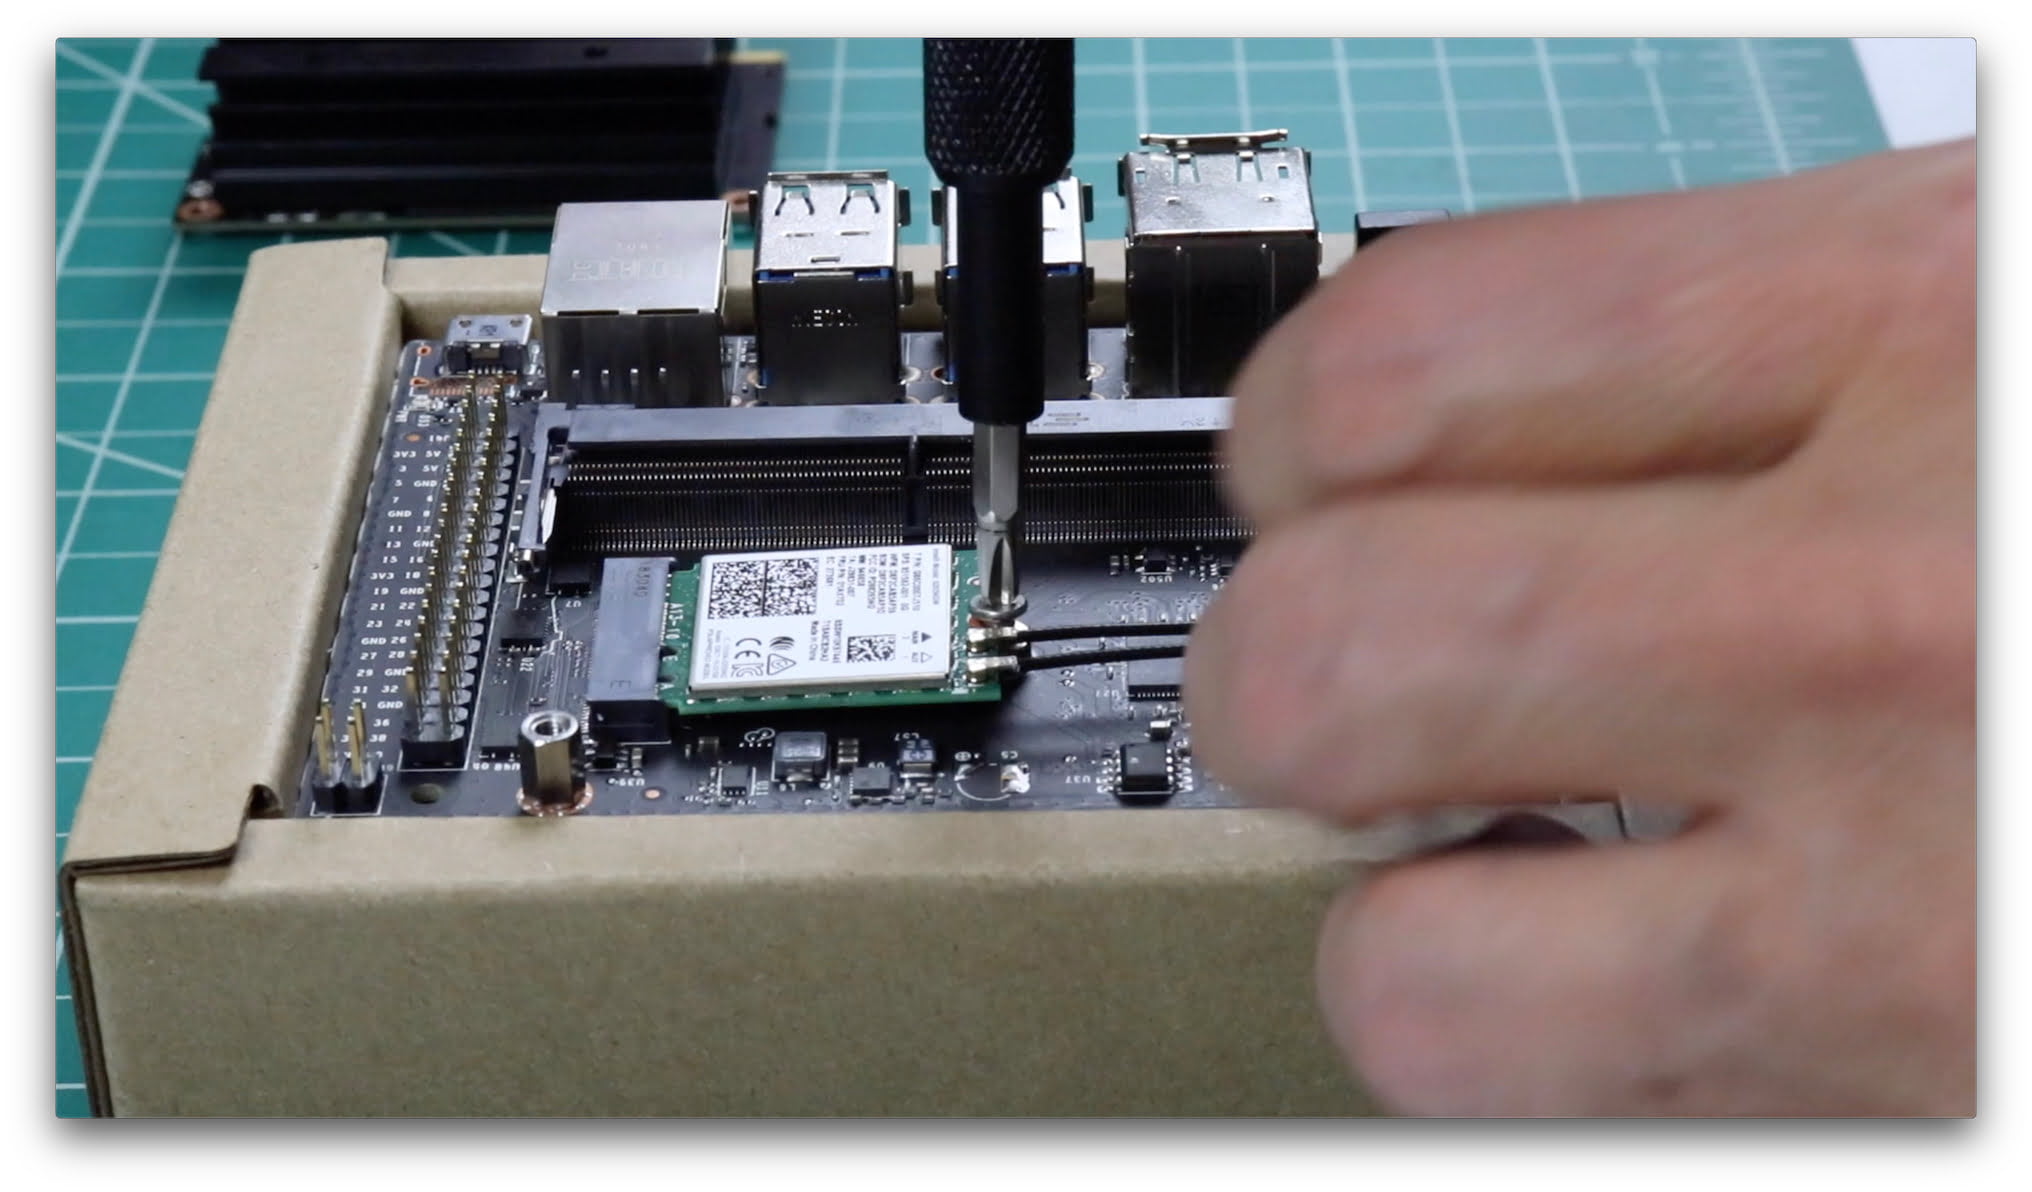
Remove the #2 Phillips screw located in the center of the board. Insert the Wifi card into the M.2 connector at a slight angle, and seat the card. Then install the #2 retaining screw. Route the wires from the antennas appropriately. You can use Kapton tape (1/8″ to 1/4″) to help secure them:
![Remove module screws]()
Remove module screws ![Secure WiFi card]()
Secure WiFi card ![Kapton tape (polyimide) to route and protect wires. (Courtesy NVIDIA https://bit.ly/2uPRbie)]()
Kapton tape (polyimide) to route and protect wires. (Courtesy NVIDIA https://bit.ly/2uPRbie)
Replace the Jetson Nano SODIMM module. Angle the card up slightly in relationship to the connector, and insert the card. Make sure that it seats correctly. Then press down on the card until retained by the latches. Then replace the #1 screws to secure the board. Installation complete!
You are now ready to use the Jetson. Plug everything in, and follow the usual wireless network selection process. See the video if you need more details.
In the video, we played around with a Sony Playstation PS4 controller. If you’re a maker, that’s a straightforward way to get easy input from buttons and variable input from the joysticks and triggers.
Conclusion
There’s a couple of ways to think about having Wifi access. One way is to think that it could have been added to the board inexpensively, and should be standard. While that’s certainly a valid view, not integrating the wireless and leaving a separate slot for expansion is a great alternative for people who want more flexibility in their choices.
Folks have different needs, some may want cell connectivity, for example. Plus, it makes the whole validation process a lot easier not having to include the radio (each country usually has their own standards), so that the Jetson Nano can roll out worldwide at a quicker rate.
The post Jetson Nano + Intel Wifi and Bluetooth appeared first on JetsonHacks.


