Note: Everything in the RACECAR/J store is 10% off from Black Friday to Cyber Monday.
In earlier articles, we built a RACECAR/J using the MIT platform specification. The MIT platform accepts a Jetson TX Development Kit, a Hokuyo UST-10LX Lidar, and a Stereolabs ZED camera for the computing and sensing elements of the RACECAR.
The RACECAR/J FlatNose Platforms provide a wide prototyping area at the front of the vehicle in place of the mounting points for the Hokuyo Lidar. Looky here:
Background
For people that are looking to use different sensors on their RACECAR, the FlatNose Platforms provide a an alternative for a more flexible layout of compute power and sensors. Some people find the $1700 USD price tag of the Hokuyo beyond their budget, but would still like to experiment with autonomous vehicles. For a vehicle traveling at high speed, the scan rate and ranging abilities of a lidar like the Hokuyo are needed. However, for lower speed manuevers a device such as a RP-Lidar may be an attractive alternative. Or you may not be interested in lidar at all, and what more space to mount a radar or more cameras. That’s what the RACECAR/J FlatNose Platforms are for!
One way to think about RACECAR/J is that it consists of two parts. The first part is the chassis, a 1/10 scale remote control car with modifications to support the extra weight of the electronics. The second part is the electronics. The electronics consist of the computers and sensors which enable the car to act autonomously.
The electronics attach to platform decks, which in the case of RACECAR/J are made from precision cut 3/16″ Delrin sheets.
The full RACECAR/J kit includes the mechanical hardware, platform decks, electronic speed controller and USB hub shown in the video. Full kits are available in the RACECAR/J shop.
The Platform Decks and Mechanical hardware are available separately in the RACECAR/J shop.
In this build, we’ll cover installing a RP-Lidar A2 along with a webcam for our sensors. Later will will install an Intel RealSense D435i. If you’re building your own, you may want to use different parts.
Tools and Supplies
Here are some of the hand tools in the video:
- iFixit Toolkit: http://amzn.to/2zMSYJz
- Tap and Die Set 40-Piece SAE
- A 3/16″ Nut Driver
Some paper towels and isopropyl alcohol can are useful for cleaning the platform decks. Soapy water is a good alternative.
3M Dual Lock Reclosable Fastener is used to attach the USB Hub to the platform deck. Industrial Velcro is a good alternative.
Platform Deck Preparation
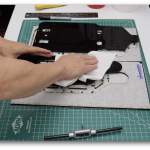
If you order the FlatNose Platform Decks from the RACECAR/J shop, the decks are delivered as a single piece of Delrin protected by an overlay sheet. As shown in the video, remove the decks from the sheet and remove the overlay sheet.
After removing the overlay sheet, clean the platform decks. The laser cutting process leaves a residue which tends to create a mess. In the video, isopropyl alcohol is the cleaning agent; some soap and water can be used as a substitute. Use a lintless towel if possible, you can wipe it down afterwards with a micro fiber cloth if need be.


You may notice that the Platform Deck has some surface scratches. This is normal. Delrin is an industrial plastic, and arrives from the manufacturer with some surface imperfections.
Standoffs
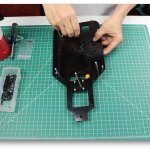
As an optional step, you can use a 4-40 tap to thread the holes for the standoffs. If you have a large number of RACECAR/Js to build, this is a real time saver. It makes assembly much easier, and you don’t have to worry about snapping off the standoffs.

The holes drilled in the platform deck are sized such that the standoffs are self tapping. You can simply use a 3/16″ driver to help screw the 1/4″ standoffs into the platform deck. If you tap the holes before hand, assembly is much easier. Here is a major WARNING: Do not over tighten the standoffs!! Aluminum is a soft metal, and your super human strength may sheer the standoff. Removing the standoff remains is very unfun. Don’t ask me how I know that.
8 1/4″ 4-40 standoffs go on the top of the bottom platform deck. Here’s how it should look after installation:

Next, install the 5 2″ Standoffs with 7/16″ 4-40 machine screws in the locations shown below:

Do a test fit of the upper platform to make sure everything lines up correctly.
The placement of the Electronic Speed Controller and the USB hub are the same on both the FlatNose and the BigMouth platform decks. We cheat a little here and show the pictures from the BigMouth build.
Electronic Speed Controller
RACECAR/J uses an open source electronic speed controller (ESC). Previously this was called a VESC, but due to copyrights each manufacturer now has a different name for their particular version of the hardware. The ESC takes two forms. There are mounting hole patterns on the lower platform deck for either form. For a traditional VESC derivative, 1/4″ standoffs are used to mount the ESC. The video covers the non-traditional Enertion Boards FOCBOX installation. The FOCBOX is a more compact and better package for this application.
Here are the mounting points:

The ESC should be placed on the bottom of the platform. There are 4 through holes to mount the FOCBOX, which is held in place by M3x8 mm machine screws.


Once the FOCBOX is in place, add the extra long header to connect with the steering servo, which happens later in the assembly. If you are using the full RACECAR/J kit, the servo header should be installed and the FOCBOX pre-programmed for the RACECAR/J application.

USB Hub
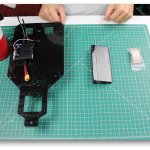
The next step is to mount the Amazon Basics – 7 Port USB Hub. Turn the Platform Deck over. Four pieces of Dual Lock tape, each about 2″ long, attach the hub to the underside of the platform. First, attach two pieces of Dual Lock to the underside of the USB Hub. Second, lightly attach the mating Dual Lock tape to each. Remove the backing tape, and then place the the hub on the platform. Then remove the hub, and make sure that the Dual Lock firmly adheres to the platform deck.


When finished, run a USB cable (Micro-B to USB A) cable from the FOCBOX underneath the USB Hub mount. The Dual Lock acts as a raceway to run the cable. Attach the USB Hub to the Dual Lock tape on the platform, and then plug the USB cable in to the hub.

Conclusion
Earlier we built a chassis for a RACECAR/J. In the second part of this article, we will install compute power and sensors. Stay tuned!
The post RACECAR/J FlatNose Platform Part I appeared first on JetsonHacks.